Cameras and Other Gadgets - Archives
About Us
Safariing
Travelling
Accommodation
Equipment & Gadgets
Souvenirs
Clothing
Safari Activities
Coastal Activities
Security
Health
Where
When
Experiences
Slideshows
Evolution
Contacts
Site Map
Sub Site
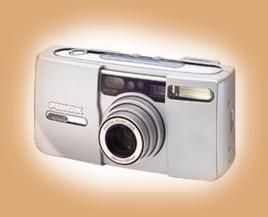 |
Film Cameras with Zoom Lenses Over the years Alison has graduated from a Pentax Compact Zoom with built-in 28-170mm auto-focus zoom lens, through a Canon EOS SLR camera with interchangeable 28-75mm and 50-300mm zoom lenses, adding a x2 converter to this. It became cumbersome continually changing lenses and missing shots, so the lens was replaced with a Sigma 50-500mm lens compatible with the Canon EOS body, rather than buying a second body. |
 |
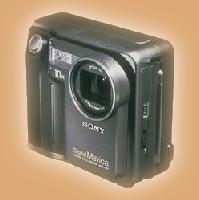 |
Digital Cameras I eventually decided I wanted more to do on safari than spotting and bought my first camera - a digital. I chose the Sony Mavica MVC-FD7 because : it had a x10 zoom lens ; it saved directly to floppy disk, which could be easily read by any PC. |
|
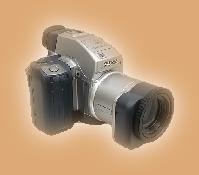
The VGA format (640x480 pixels) and the high compression used to save a reasonable amount of images on a single disk seriously limited the picture quality. I struggled on until I found a camera that offered the correct balance between zoom and resolution. Although there were higher resolution cameras available I again opted for the Sony Mavica CD1000 with a 2 million pixel resolution and x10 zoom lens. This saves images directly to mini-CDs that can again be read directly on a PC. It also offers multi-program functions, steady-shot and flash functions similar to SLR cameras. |
 |
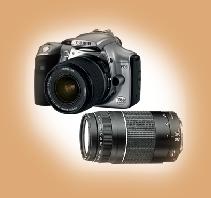 |
Alison finally 'went digital' in the Summer of 2005 - well she had to taking up to twenty 36 exposure films on every safari and throwing 75% of them away! She adopted the Canon EOS300D - a whopping 6.5 mega-pixel camera (it was then)! The functions and controls are similar to the film version and it takes the same lenses. She started by taking the camera and the 75-300mm zoom lens (equivalent to 120-480mm), as the combination isn't so bulky and is much lighter to use. |
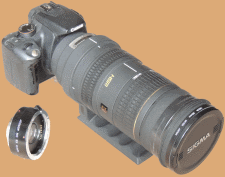
I finally gave my Sony CD1000 camera away to a friend at the end of our last South African safari. I had exhausted my stock of mini-CDs and had been thinking of upgrading to an SLR for some time. By then Alison had bought a Sigma 28-300mm lens, so she didn't have to keep swapping lenses. It seemed a waste for me to purchase the Sony Alpha camera I had been considering with its own family of lenses, when we had 3 perfectly good ones lying around. I tracked down a very reasonable second-hand Canon EOS 350 camera, with its 8.5 mega pixels. I used this with the Sigma 50-500mm lens Alison no longer uses, which she had found too heavy. I turned the lens rest around so it could be used like a rifle which gave the combination more stability. |
After toying with a Canon compact camera and found it wanting I bought another Canon EOS 350D body (I'd damaged the auto-focus of the previous body and it wasn't worthwhile repairing) and reverted to using the Sigma 50-500mm lens. This combines an excellent zoom lens with a reasonable 8 mega-pixel resolution camera (for PC slideshows at least) using low level of compression retaining image quality. |
 |
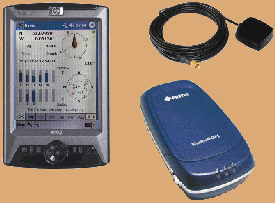 |
By 2004 with all our safaris I was finding it difficult to recall our routes and I decided I needed some help. So I bought a GPS kit. I didn't need all the usual navigation tools with the usual display, maps, waypoints etc, but a simple logger and the means to extract the raw data. After a little research I bought a refurbished portable Pretec bluetooth logger with memory for 32,000 'breadcrumbs' and 12 hour battery and combined it with the HP iPAQ RX3715 which came with bluetooth built-in. |
|
The first software application I tried with the iPAQ appeared to work well in the UK, but failed to cope with the Equator. After complaining and getting nowhere I finally downloaded Navio from HP's web-site, which allows me to upload any calibrated image file to overlay the tracks and position. I later captured high resolution satellite images from Google Earth with suitable layers of information before we travelled and used these. |
||
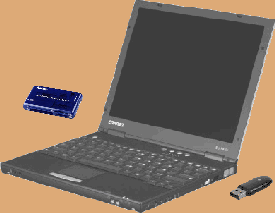
Of course this has inevitably pushed us to carry a laptop to regularly transfer and review the images (rather than risk losing a memory card). At the time Alison changed her camera her company were replacing their Compaq Evo N200 sub-notebooks and we managed to buy one at a good rate. This was ideal as local flight operators are not as generous with their baggage allowance as international ones and we could leave the docking station with the CD drive at home to reduce weight. Our travel kit includes a multi-card reader and a bluetooth USB adaptor. |
||
 |
In recent times I have adapted the my slideshow viewer (developed in the days of Windows 98 before Microsoft included one) to combine all the raw data (photos, GPS log files, pre-loaded calibrated map and satellite files) so that within 30 mins of completing a safari it can play a similar slideshow to those available on the slideshows page, with photo positions determined by cross referencing the corrected time to the GPS log file. |
|
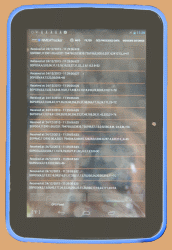
With the ever increasing weight of our hand-baggage and limited allowance on internal flights I researched and bought a Hudl Android tablet to back-up our photos. This beat the competition for resolution and functonality by miles (scoring 94301 vs the its' closest rival score of 8550 in my spreadsheet comparison). I resolved the problem of reading the Canon's CF cards and the Nikon's micro-SD on the third attempt by buying a compatible USB-OTG cable and bought a 16 Mbyte micro-SD card to provide additional storage. |
 |
|
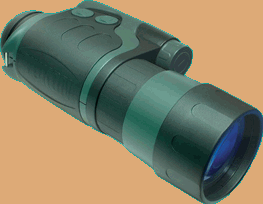
Being a CCTV expert I had often considered how the technology I played with every day could improve the safari experience and after toying with many solutions I bit the bullet in November 2009 and bought a night vision scope. I chose the Yukon 24027 NVMT 4x50 as it offered the longest range at an affordable price and was advertised with an adaptor compatible with our Canon cameras - ideal! Unfortunately the reality was a little disappointing. Although the adaptor fitted together quite neatly it didn't position the scope and camera well enough to allow the camera to focus. I managed to rig up a heath-robinson affair which worked, although the combination was flimsy and needed to be used carefully. |
 |
|
The best use we found for it was star gazing, especially on Kenya's beaches where the sky is clear. The 'Seven Sisters' have at least 13 stars when viewed through the scope and once your eyes are trained, moving the scope slightly shows many more - but as it needs to move to see this extra 'layer' they are too difficult to count. |
||